Aucun message portant le libellé crochet. Afficher tous les messages

jeudi 4 juin 2015

Leafeon inspired amigurumi


Leafeon inspired amigurumi


Leafeon is one of the eeveelution. It’s a grass type Pokémon. I’ve made it

"chibi style" with round head and body

For this project I used

Cream white, dark brown and green yarn (worsted weight)

A hook that match the yarn (I used 4mm)

Brown felt (use a brown very similar to the brown yarn)

Balck and white fabric paint

Green and white roving to mimic fur

Fabric glue

Fiberfill

Scissors

Yarn needle

Since I work this project in the round I used a stitch marker

Finish project is about 12 inch from bottom to top of the ears

Abbreviations:

MC = Magic Circle

SC = Single Crochet

INC = Increase (2 SC in same ST)

DEC = Decrease (2 SC together)

ST = Stitch

Body:

All cream white

Row 1: MC 6 SC in it

Row 2: 2 SC in each ST (12 SC)

Row 3: * SC in next ST, INC, repeat * (18 SC)

Row 4: *SC in next 2 ST, INC, repeat * (24 SC)

Row 5: *SC in next 3 ST, INC, repeat * (30 SC)

Row 6: *SC in next 4 ST, INC, repeat * (36 SC)

Row 7: * SC in next 5 ST, INC, repeat * (42 SC)

Row 8: *SC in next 6 ST, INC, repeat * (48 SC)

Row 9/16: SC all around (48 SC)

Row 17: *SC in next 6 ST, DEC, repeat * (42 SC)

Row 18: *SC in next 5 ST, DEC, repeat * (36 SC)

Row 19: *SC in next 4 ST, DEC, repeat * (30 SC)

Row 20: * SC in next 3 ST, DEC, repeat * (24 SC)

Row 21: * SC in next 2 ST, DEC, repeat * (18 SC)

Fill head with fiberfill

Row 22: SC all around (18 SC)

Row 23: * SC in next 2 ST, INC, repeat * (24 SC)

Row 24: *SC in next 3 ST, INC, repeat * (30 SC)

Row 25: *SC in next 4 ST, INC, repeat * (36 SC)

Row 26/32: SC all around (36 SC)

Row 33: * SC in next 4 ST, DEC, repeat * (30 SC)

Fill the rest of the body with fiberfill

Row 34: * SC in next 3 ST, DEC, repeat * (24 SC)

Row 35: * SC in next 2 ST, DEC, repeat * (18 SC)

Row 36: *SC in next ST, DEC, repeat * (12 SC)

Continue until you can close the body weave in the ends

Ears x 2

Start with green

Row 1: MC 3 SC in it

Row 2: 2 SC in each ST (6 SC)

Row 3: SC all around (6 SC)

Row 4: *SC in next ST, INC, repeat * (9 SC)

Row 5: *SC in next 2 ST, INC, repeat * (15 SC)

Row 6: SC all around (15 SC)

Row 7: *SC in next 3 ST, INC, repeat * (21 SC)

Row 8: *SC in next 4 ST, INC, repeat * (27 SC)

Row 9: SC all around (27 SC)

Row 10: *SC in next 5 ST, INC, repeat * (33 SC)

Row 11/13: SC all around

Row 14: *SC in next 5 ST, DEC, repeat * (27 SC)

Row 15: *SC in next 4 ST, DEC, repeat * (21 SC)

Change to cream white

Row 16: SC all around (21 SC)

Row 17: *SC in next 3 ST, DEC, repeat * (15 SC)

Row 18: SC all around (15 SC)

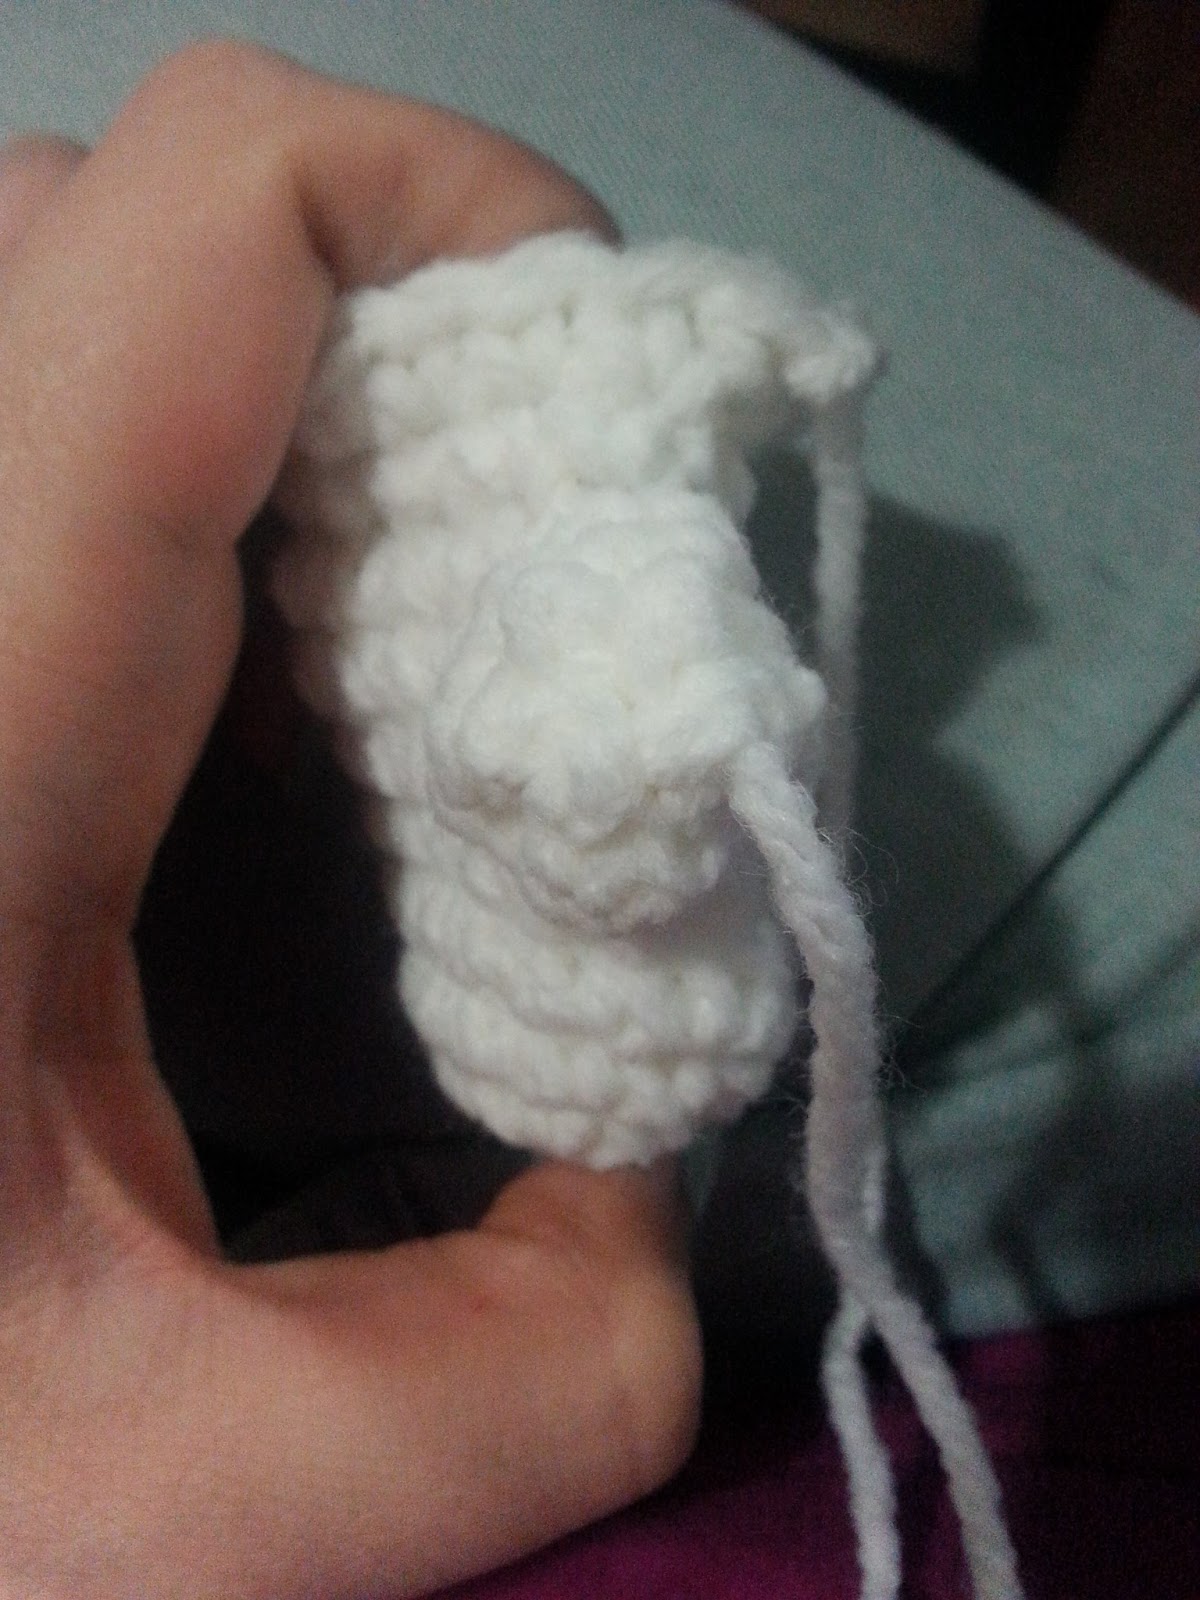
Don’t stuff keep flat, keep a tail long enough to join to head glue brown felt to ears

Tails

Start with green

Row 1: MC 3 SC in it

Row 2: 2 SC in each ST (6 SC)

Row 3: SC all around (6 SC)

Row 4: *SC in next ST, INC, repeat * (9 SC)

Row 5: SC all around (9 SC)

Row 6: *SC in next 2 ST, INC, repeat * (15 SC)

Row 7: *SC in next 3 ST, INC, repeat * (21 SC)

Row 8: *SC in next 4 ST, INC, repeat * (27 SC)

Row 9: *SC in next 5 ST, INC, repeat * (33 SC)

Row 10: SC all around (33 SC)

Row 11: *SC in next 6 ST, INC, repeat * (39 SC)

Row 12/13: SC all around

Row 14: *SC in next 6 ST, DEC, repeat * (33 SC)

Row 15: *SC in next 5 ST, DEC, repeat *(27 SC)

Row 16: *SC in next 4 ST, DEC, repeat *(21 SC)

Row 1719: SC all around (21 SC)

Row 20: *SC in next 4 ST, INC, repeat *(27 SC)

Row 21: *SC in next 5 ST, INC, repeat * (33 SC)

Row 22: *SC in next 6 ST, INC, repeat * (39 SC)

Row 23: *SC in next 7 ST, INC, repeat *(45 SC)

Row 24/25: SC all around (45 SC)

Row 26: *SC in next 7 ST, DEC, repeat * (39 SC)

Row 27: *SC in next 6 ST, DEC, repeat * (33 SC)

Row 28: *SC in next 5 ST, DEC, repeat *(27 SC)

Row 29: SC all around (27 SC)

Change color to cream white

Row 30: SC all around (27 SC)

Row 31: *SC in next 4 ST, DEC, repeat * (21 SC)

Row 32: SC all around (21 SC)

Don’t stuff keep flat, keep a tail long enough to join to the body

Legs x4

Start with brown

Row 1: MC 6 SC in it

Row 2: 2 SC in each ST (12 SC)

Row 3: *SC in next ST, INC, repeat * (18 SC)

Row 4: SC all around (18 SC)

Change to cream white

Row 5/7: SC all around (18 SC)

Keep tail long enough to join to body

Add roving on head

Glue eyes and add details with paint

And that’s it

dimanche 22 février 2015

falling beanie

ooooooooooooooh its cold outside i mean very cold can't go out without a nice warm hat


This beanie is so comfortable


i used a worsted weight yarn (loops and  threads impeccable)


Yup I took the picture and it was still warm outside


CH: Chain
DC: Double Crochet
FPDC: front post double crochet
SLST: slip stitch
SC: single crochet
BL: back loop
DEC: decrease 2 SC together


Chain 62


join with slst


row 1: begin with a standing dc or if you like ch 3, DC all around
row 2/6: join with slst start with standing dc or ch 3, *2 DC, 2 FPDC* all around.
row 7: sc all around
row 8: sc in bl
row 9: sc, *ch 1, skip 1 st, sc in next st, repeat all around
row 10: SC, SC, *ch 1, skip 1 st, sc in next st repeat
repeat row 8/10 till you hat measure 9 1/2 inch (about 6 rep)
Now work the decrease row in BL
row 25: 8 sc, dec all around SC in 7 remaining st
row 26: DEC, 7 sc all around
row 27: sc all around
row 28: 6 sc, dec, sc in last st
row 29: DEC, 5 sc, sc in last 6 st
row 30: 4 sc, dec, sc in the last 5 sc
row 31 plain row
row 32 dec,3 sc, sc in last 4 sc
row 33: 2 sc, dec sc in last st
row 34: sc, dec, sc in last st
row 35: dec, sc in last st


you're done or you can add a pompom


mercredi 2 octobre 2013

African flower octogon

African flower are one of my favorite thing to crochet we usually see it in pentagon form and I was ask if I can do a octagon so here we are


this one is made with 100% coton and I used a 5 mm hook

Start by doing a CH5

Row 1: Join with a slip stitch, CH 3, DC, CH 1, now repeat 2 DC, CH 1, 7 times so you have 8 set of 2 DC CH 1. Join on the top of the first CH 3

Row 2: slip stitch in the first CH 1 space, CH 3, 2 DC, CH 1, repeat 3 DC CH 1, 7 times join in the top of the first CH 3 cut yarn


change color

you join the new color in a CH 1 space

Row 3: CH 3, DC, CH 2, 2 DC, repeat 2 DC, CH 2, 2 DC in every CH 1 space join in top of first CH 3

Row 4: slip stitch in first CH 2, CH 3, 6 DC, slip stitch, 7 DC, slip stitch, continue all around join in top of CH 3 cut yarn


change color

Row 5: SC around on each petal and do a long SC in between petal


cut yarn


change color


Row 6: start on top of a petal do a SC, HDC, DC, DC, now you should be between a petal were's there is a long SC stitch do TR, CH 3, TR in the same stitch, DC, DC, HDC, SC


continue like this all around

join with the first SC you can stop there or ad other rows

if you wish to ad other row HDC or DC all around for the corner do 2 HDC CH 2 2 HDC or 2 DC CH 2 2 DC

and we're done!!!!!

hope you like it see you next time!!!
-xoxo-


lundi 30 septembre 2013

Baby security blanket (lovey) bear version

Hi here we go again with another pattern this project is also available in video tutorial here on youtube

for this project you will need 2 colors of yarn I used light bleu and white a little bit of black for eye, mouth and nose

5.5 mm hook for the blanket and 4mm  hook for the bear

fiberfill

yarn needle

scissors


let's start!!!!

CH 4 join with beginning chain with a slip stitch

Row 1: CH 3, DC, CH 1, 2 DC, CH 1, 2 DC, CH 1, 2 DC, CH 1 join in top CH 3 with slip stitch

Row 2: slip stitch in the CH 1 space, change color, CH 3, DC, CH 1, 2 DC in same CH 1 space, CH 1, 2 DC, CH 1, 2 DC in same CH 1 space, CH 1, 2 DC, CH 1, 2 DC, in same CH 1 space, CH 1 , 2 DC, CH 1, 2 DC, in same CH 1 space, CH1 join with slip stitch in top CH 3

Row 3: slip stitch in first CH 1 space, change color, CH 3, DC, CH 1, 2 DC in same space, CH 1, 2 DC in CH 1 space, CH 1, 2 DC, CH 1 2 DC, in same space, CH 1, 2 DC in CH 1 space, CH 1, 2 DC, CH 1, 2 DC in same space, CH 1, 2 DC in CH 1 space, CH 1, 2 DC, CH 1, 2 DC in same space, CH 1, 2 DC in CH 1 space, CH 1 join in top CH 3

Row 4/ : change color corner are made with 2 DC, CH 1, 2 DC for the remaining CH 1 space on the side just put 2 DC continue till you get a 10 inch square

edging: with white start by doing HDC all around in corner do 2 HDC joing with beginning

with blue SC, skip next stitch, 5 DC in same stitch, skip next stitch, SC, skip next stitch, continue around

weave in all ends now the blanket part is done lets start the bear part

head:

Row 1: MC 6 SC in it

Row 2: 2 SC in each stitch around

Row 3: SC, 2 SC in same stitch, SC, 2 SC in same stitch, continue  all around

Row 4: SC, SC, 2 SC in same stitch, continue all around

Row 5: SC, SC, SC, 2 SC in same stitch, continue all around

Row 6: SC, SC, SC, SC, 2 SC in same stitch, continue all around

Row 7: SC, SC, SC, SC, SC, 2 SC in same stitch, continue all around

Row 8: SC, SC, SC, SC, SC, SC, 2 SC in same stitch, continue all around

Row 9/14: SC all around

Row 15: SC, SC, SC, SC, SC, SC, DEC, continue all around

Row 16: SC, SC, SC, SC, SC, DEC, continue all around

Row 17: SC, SC, SC, SC, DEC, continue all around

Row 18: SC, SC, SC, DEC, continue all around

you might want to start stuffing now

Row 19: SC, SC, DEC, continue all around

Row 20: SC, DEC, continue all around

Row 21: DEC all around

weave in the end make sure the head is well closed

add eye, nose and mouth with black yarn

Ears (x2)

CH 3

Row 1: 5 DC in third CH from hook

Row 2: CH 2, DC in first stitch, 2 DC in the rest of each stitch

Row 3: CH 1, SC around cut yarn leave a tail long enough to join to the head weave in the other tail

Arms (x2)

Row 1:MC 6 SC in it

Row 2: 2 SC in each ST around

Row 3/8: SC around

cut yarn leave a tail long enough to join the arms the the head and to the blanket

join the arms and head to the middle of the blanket and your done!!!! you can also vary the animal buddy on top or change colors have fun


see you next time !!!

-xoxo-


vendredi 13 septembre 2013

Mickey inspire baby set

This is an old pattern from my first blog i decided to put it here hope you like it


beanie with black hook size 5 mm


magic circle
row 1: 10 HDC in magic ring, slip stich to join to first HDC, ch 1 (10 hdc)
Row 2: 2 HDC in each around , slip stich to join, chain 1 (20 hdc)
Row 3: 2 HDC, HDC in next hdc, repeat around ,slip stitch to join, ch 1 (30 hdc)
Row 4: 2 HDC, HDC in next 2 hdc, repeat around ,slip stitch to join, ch 1 (40 hdc)Row 5: 2 HDC, HDC in next 7, repeat around slip stch to join, ch 1 (45 HDC)
Row 6-14: HDC in each hdc around slip stitch to join (45 HDC)
fasten off


Ears (make 2) with black hook size 5 mm
ch 2
row 1: 12 hdc in second chain from hook (12 hdc)
row 2: 2 hdc in each hdc (24 hdc)
row 3: 2 hdc, hdc in next hdc (36 hdc)
fasten off make sure to leave a long tail
join each ears on the cap between row 3 and 6

mitten (make 2) with white hook size 5 mm

chain 2
row 1: 12 sc in second chain from hook, sl st to join, ch 1  (12 sc)
row 2: 2 sc next sc, sc in next 2 sc all the way around, sl st to join, ch 1  (16 sc)
row 3 to 13: sc in each sc around, ch 1  (16 sc)
row 14: sc2tog , sc in next 2 sc (12 sc)
Bootie (make 2) with yellow hook size 5 mm

chain 2
row 1: 12 sc in second chain from hook, slip stitch to join, ch 1  (12 sc)
row 2 to 7: sc in each sc around, slip stitch to join,ch 1  (12 sc)
row 8 to 13: sc in each sc around ch 1 turn, do not slip stitch to join
join the end of the bootie by slip stitch every stitch fasten off
join yarn at the space left were you did not slip stich to join every row sc around repeat two more row
diaper cover with red hook size 5.5 mm

chain 52
row 1: Hdc in the 3rd ch from the hook, hdc across, ch 2. (51)
row 2: Hdc in the first stitch, chain 2, skip 2 stitches, hdc into the next 43, chain 2, skip 2 stitches, hdc in the next 2 stitches, ch 2.
row 3: Hdc across. ch 2 (51)
row 4: Sl st 14, hdc in the next 23, ch 2, turn (23)
row 5: Ch 2, Hdc in each
row 6: Hdc in the next 21, hdc2tog. Ch 2 (22)
row 7: Hdc in the next 20, hdc2tog. Ch 2 (21)
row 8: Hdc in the next 19, hdc2tog. Ch 2 (20)
row 9:Hdc in the next 18, hdc2tog. Ch 2 (19)
row 10: Ch 2, Hdc in each hdc around (19 hdc)
row 11: Ch 2, Hdc in each hdc around (19 hdc)
row 12: Ch 2, Hdc in each hdc around (19 hdc)
row 13: Ch 2, Hdc in each hdc around (19 hdc)
row 14: Ch 2, Hdc in each hdc around (19 hdc)
row 15: Ch 2, Hdc in each hdc around (19 hdc)
row 16: Ch 2, Hdc in each hdc around (19 hdc)
row 17: Ch 2, Hdc in each hdc around (19 hdc)
row 18: Ch 2, Hdc in each hdc around (19 hdc)
row 19: Ch 2, Hdc in each hdc around (19 hdc)
row 20: Ch 2, Hdc in each hdc around (19 hdc)
row 21: Ch 2, Hdc in each hdc around (19 hdc)
row 22: Ch 2, Hdc in each hdc around (19 hdc)
row 23: Ch 2, Hdc in each hdc around (19 hdc)
Sc around the whole cover twice, weave in the ends. Sew the button on the center of the flap
mouse tail with black (optional) hook size 4mm
chain 4 slip stich to join
single crochet around for a couple of row you can reduce size by sc2tog once than continue sc around untill you get the lenght you want
and we're done! hope you'll like

vendredi 28 juin 2013

Hello Kitty pattern V.2

This week we're gonna do an other hello kitty....i know this is my second hello kitty pattern but this one is better ^^ i little bit smaller


So you will need :
 
 
4 mm hook
scissors
yarn needle
white yarn
2 colors (like in picture red/pink or 2 shade of purple)
stuffing
small amount of black yarn
black felt
yellow felt


BODY


Row 1: MC 6 SC in it
Row 2: 2 SC in each ST
Row 3: SC in next SC, 2 SC in same SC
Row 4: SC in next 2 SC, 2 SC in same SC
Row 5: SC in next 3 SC, 2 SC in same SC
Row 6: SC in next 4 SC, 2 SC in same SC
Row 7: SC in next 5 SC, 2 SC in same SC
Row 8: SC in next 6 SC, 2 SC in same SC
Row 9/13: SC all around
Row 14: SC in next 6 SC, DEC
Row 15: SC in next 5 SC, DEC
Row 16/17: SC all around
Row 18: SC in next 4 SC, DEC
Row 19/20: SC all around
Row 21: SC in next 3 SC, DEC
SLST in next ST weave it the end
 
 
HEAD


Row 1: MC 6 SC in it
Row 2: 2 SC in each ST
Row 3: SC in next SC, 2 SC in same SC
Row 4: SC in next 2 SC, 2 SC in same SC
Row 5: SC in next 3 SC, 2 SC in same SC
Row 6: SC in next 4 SC, 2 SC in same SC
Row 7: SC in next 5 SC, 2 SC in same SC
Row 8: SC in next 6 SC, 2 SC in same SC
Row 9: SC in next 7 SC, 2 SC in same SC
Row 10: SC in next 17 SC, 2 SC in same SC, SC in next 26 SC, 2 SC in same SC, SC in next 9 SC
Row 11: SC in next 18 SC, 2 SC in same SC, SC in next 27 SC, 2 SC in same SC, SC in next 9 SC
Row 12/17: SC all around
Row 18: SC in next 18 SC, DEC, SC in next 27 SC, DEC, SC in next 9 SC
Row 19: SC in next 17 SC, DEC, SC in next 26 SC, DEC, SC in next 9 SC
Row 20: SC in next 7 SC, DEC
Row 21: SC in next 6 SC, DEC
Row 22: SC in next 5 SC, DEC
Row 23: SC in next 4 SC, DEC
Row 24: SC in next 3 SC, DEC
SLST in next ST leave a tail long enough to join to body


EARS X2
 
 
Row 1: MC 6 SC in it
Row 2: SC around
Row 3: 2 SC in each ST
Row 4: SC around
Row 5: SC in next SC, 2 SC in same SC
Row 6: SC in next 2 SC, 2 SC in same SC
Row 7: SC around
Row 8: SC in next 3 SC, 2 SC in same SC
SLST in next ST leave tail long enough to join to head
 
 
LEGS X2
 
white
Row 1: MC 6 SC in it
Row 2: 2 SC in each ST
Row 3: SC in next SC, 2 SC in same SC
Row 4/7: SC around
change color (same as body)
Row 8/10: SC around
SLST in next ST leave tail long enough to join to body


ARMS X2
 
white
Row 1: MC 6 SC in it
Row 2: 2 SC in each SC
Row 3: SC in next SC, 2 SC in same SC
Row 4/7: SC around
change light color
Row 8/10: SC around
SLST in next ST leave tail long enough to join to body


BOW
with same color of the body
 
Row 1: CH 35 SLST in the first chain ( make sure its not twisted)
Row 2/4: CH 2 DC around
flatten the piece slip stitch on both border
with same color of yarn and wrap it in the middle very tightly
 
stuff ears, head, arms, body, legs join all the pieces together
make small line on both side of the face with black yarn


so that's it

see you next time
-xoxo-


samedi 22 juin 2013

Tinkerbell inspire fairy

 I was suppose to post this yesterday but I was son nice outside that the girls and I spent the afternoon in the pool


and later that evening I went to Michael's...and the had yarn on sale....


so I bought this I got wool, cotton, "fun yarn"

and today was rainy and boring

so now for this week pattern drum roll................... and other amigurumi

yes you might have guess with the title ^^

I made this amigurumi for my daughter Maude for her 3 birthday she love tinkerbell


Hair bun (yellow)

Row 1: MC 6 SC in it
Row 2: 2 SC in each ST
Row 3: SC in next SC, 2 SC in same SC
Row 4/5: SC all around
Row 6: SC in next SC, DEC
Row 7: DEC all around
SLST in next ST cut yarn leave a tail long enough to join to head


Head

start with yellow

Row 1: MC 6 SC in it
Row 2: 2 SC in every ST
Row 3: SC in next SC, 2 SC in same SC
Row 4: SC in next 2 SC, 2 SC in same SC
Row 5: SC in next 3 SC, 2 SC in same SC
Row 6: SC in next 4 SC, 2 SC in same SC
Row 7: SC in next 5 SC, 2 SC in same SC
Row 8: SC in next 6 SC, 2 SC in same SC
Row 9/11: SC all around
Row 12/16 ( in beige): SC all around
at this point you can add the eyes and the hair bun


Row 17: SC in next 6 SC, DEC
Row 18: SC in next 5 SC, DEC
Row 19: SC in next 4 SC, DEC
Row 20: SC in next 3 SC, DEC
Row 21: SC in next 2 SC, DEC

SLST in next ST cut yarn leave tail long enough to join to body

Fringe (yellow)

Row1: CH 8, turn, 7 SC
Row 2: DEC, 3 SC, DEC
Row 3: DEC, SC, DEC
Row 4: DEC
Row 5: SC all around
join to head in between the eyes


Body (green)

Row 1: MC 6 SC in it
Row 2: 2 SC in each ST
Row 3: SC in next SC, 2 SC in same SC
Row 4: SC in next 2 SC, 2 SC in same SC
Row 5: SC in next 3 SC, 2 SC in same SC
Row 6: SC in next 4 SC, 2 SC in same SC
Row 7: SC in next 5 SC, 2 SC in same SC
Row 8: SC all around in back loop only
Row 9/17: SC all around
Row 18: SC in next 5 SC, DEC
Row 19: SC in next 4 SC, DEC
Row 20: SC in next 3 SC, DEC
Row 21: SC in next 2 SC, DEC
weave in the ends


Skirt

Row 1: join in the front loop, SC all around
Row 2: *SC, skip 2 ST, 5 DC in same ST, skip 2 ST, repeat *
SLST in first SC weave in the ends

Feet/Legs X 2


Row 1: (with green) MC 6 SC in it
Row 2: 2 SC in every ST
Row 3: SC in next SC, 2 SC in same SC
Row 4/5: SC all around
Row 6: SC in next SC, DEC
Row 7/14: (with beige) SC all around
SLST in next ST leave tail long enough to join to body


Arms X2 (with beige)

Row 1: MC 6 SC in it
Row 2: 2 SC in every ST
Row 3: SC in next SC, 2 SC in same SC
Row 4/5: SC all around
Row 6: SC in next SC, DEC
Row 7/14: SC all around
SLST in next ST leave tail long enough to join to body


Wings X 2 (white)

Row 1: 10 foundation ST
Row 2: 3 HDC in first ST, 9 HDC
Row 3: CH 2, turn, 9 HDC, 2 HDC in same ST, 2 HDC in same ST, 2 HDC in same, 2 HDC in same ST, 9 HDC

join wings together


you can also had a green chain to the hair bun


now stuff every part and join them to form the fairy


that's it see you next time

-xoxo-


dimanche 16 juin 2013

Dragon Amigurumi

Lately as you might know I was able to work a lot on amigurumi this week pattern will be a dragon amigurumi


this is our little buddy


Body

Row 1: MC 6 SC in it
Row 2: 2 SC in each ST
Row 3: SC in next SC, 2 SC in same SC, repeat
Row 4: SC in next 2 SC, 2 SC in same SC, repeat
Row 5: SC in next 3 SC, 2 SC in same SC, repeat
Row 6: SC in next 4 SC, 2 SC in same SC, repeat
Row 7: SC in next 5 SC, 2 SC in same SC, repeat
Row 8: SC in next 6 SC, 2 SC in same SC, repeat
Row 9/16: SC all around
Row 17: SC in next 6 SC, DEC, repeat
Row 18: SC all around
Row 19: SC in next 5 SC, DEC, repeat
Row 20: SC all around
Row 21: SC in next 4 SC, DEC, repeat
Row 22/23: SC all around
Row 24: SC in next 3 SC, DEC, repeat
Row 25: SC all around
SlST in next ST cut yarn leave tail long enough to join head with head
ve tail long


Tail


Row 1: MC 6 SC in it
Row 2: 2 SC in each SC
Row 3/4: SC all around
Row 5: SC in next SC, 2 SC in same SC, repeat
Row 6: SC all around
Row 7: SC in next 2 SC, SC in same SC, repeat
Row 8/10: SC all around
stuff firmly
SLST in next stitch cut yarn leave tail long enough and join to body


Wings  X2


Row 1:CH 5,turn, 5 SC, turn
Row 2/9: SC around
Row 10: CH 1, HDC, DC, HDC, 2 SC
Row 11/17: SC around
cut yarn fold piece and join to form a tube

Row 1: CH 5, turn, 5 SC, turn
Row 2/9: SC around
fold to form a tube the attach to the bigger tube


now work the inner part of the wings make 2 of each pieces


Row 1: CH 2
Row 2: 2 SC in second chain from hook
Row 3: 2 SC in each ST
Row 4: SC, 2 SC in same ST, 2 SC in same ST, SC
Row 5: SC around
cut yarn

Row 1: CH 2
Row 2: 2 SC in second CH from hook
Row 3: 2 SC in each ST
Row 4: SC around

join both pieces to wing


then join wings to body


LEGS/FEET  X2


Row 1: MC 6 SC in it
Row 2: 2 SC in each ST
Row 3: SC in next 5 SC, 2 SC in same SC, repeat
Row 4: SC in next 6 SC, 2 SC in same SC, repeat
Row 5/6: SC all around
Row 7: SC in next 6 SC, DEC, repeat
Row 8: SC in next 5 SC, DEC, repeat
stuff

Row 1: MC 6 SC in it
Row 2:L SC in next SC, 2 SC in same SC, repeat
Row 3/7: SC all around
SLST in next ST cut yarn

pull tight the upper part of the leg and join to the foot


bring yarn to the inside of the leg to join to body


ARMS   X2


Row 1: CH 4, turn, 4 SC, turn
Row 2/5: SC around, turn
Row 6: CH 1, HDC, DC, DC, HDC
Row 7/12: SC around
fold now work in rounds: 4 SC around for 2 rows
SLST to close
sew arm to close it
bring yarn in front wrap around to form wrist


CLAWS  X4

CH 3 SLST in second CH from hook repeat 2 time join to tip of arms and legs


BELLY PLATE


Row 1: CH 3
Row 2: SC around
Row 3: SC, 2 SC, SC
Row 4: SC around
Row 5: SC, 2 SC, 2 SC, SC
Row 6: SC around
Row 7: SC, SC,2 SC, 2 SC, SC, SC
Row 8: SC around
Row 9: SC, SC, 2 SC, 2 SC, SC, SC, 2 SC, SC, SC
Row 10: SC around
Row 11: SC, SC, 2 SC, SC, SC, 2 SC, SC, SC, SC, SC
Row 12: SC around
Row 13: SC, SC, 2 SC, SC, SC, 2 SC, SC, SC, 2 SC, SC, SC, 2 SC
Row 14/17 SC around
Row 18/19: CH 1 SC around the piece
Row 20: SC with an other color

join to body you can add line if you wish


HEAD


Row 1: MC 6 SC in it
Row 2: 2 SC in each ST
Row 3: SC in next SC, 2 SC in same SC, repeat
Row 4: SC in next 2 SC, 2 SC in same SC
Row 5: SC in next 3 SC, 2 SC in same SC
Row 6: SC in next 4 SC , 2 SC in same SC
Row 7/15: SC around
Row 16: SC in next 4 SC, DEC
Row 17: SC around
Row 18: SC in next 3 SC, DEC
Row 19/20: SC around
Row 21: SC in next 2 SC, DEC
Row 22: SC around
start to stuff the head
Row 23: SC in next SC, DEC
Row 24: SC around
Row 25: DEC
close tip weave in the ends

Nose X2

MC 6 SC close join to head


HORN X 2


Row 1: MC 3 SC
Row 2: 2 SC each ST
Row 3: SC in next SC, 2 SC in same SC
Row 4: SC in next 2 SC, 2 SC in same SC
Row 5: SC in next 3 SC, 2 SC in same SC

join to head

cut pieces of felt to make eyes and eyebrows and the nose


That's it our dragon is done!!!!!


vendredi 7 juin 2013

Pirate Bear amigurumi

Well today we're going to do this adorable pirate bear


Head
 
 
Row 1: MC and do 6 SC in it
Row 2: 2 SC in each ST
Row 3: SC in next SC, 2 SC in same SC, repeat
Row 4: SC in next 2 SC, 2 Sc in same SC, repeat
Row 5: SC in next 3 SC,  2 SC in same SC,  repeat
Row 6: SC in next 4 SC,  2 SC in same SC,  repeat
Row 7: SC in next 5 SC,  2 SC in same SC, repeat
Row 8: SC in next 6 SC, 2 SC in same SC,  repeat
Row 9: SC in next 7 SC, 2 SC in same SC,  repeat
Row 10: SC in next 8 SC, 2 SC in same SC,  repeat
Row 11/21: SC around
Row 22: SC in next 8 SC,  DEC, repeat
Row 23: SC in next 7 SC, DEC, repeat
Row 24: SC in next 6 SC,  DEC, repeat
Row 25: SC in next 5 SC,  DEC,  repeat
Row 26: SC in next 4 SC,  DEC,  repeat
Row 27: SC around
 
SLST in next ST cut yarn to leave a long tail


Body


Start with brown

Row 1: MC 6 SC in it
Row 2: 2 SC in each ST
Row 3: SC in next SC, 2 SC in same SC, repeat
Row 4: SC in next 2 SC, 2 SC in same SC, repeat
Row 5: SC in next 3 SC, 2 SC in same SC, repeat
Row 6: SC in next 4 SC, 2 SC in same SC, repeat
Row 7: SC in next 5 SC, 2 SC in same SC, repeat
Row 8; SC in next 6 SC, 2 SC in same SC, repeat
Row 9/12: SC all around

now alternate with white and red one row each

Row 13/22: SC all around
Row 23: SC in next 6 SC, DEC, repeat
Row 24: SC in next 5 SC, DEC, repeat

now switch to brown

Row 25: SC in next 4 SC, DEC, repeat
Row 26: SC all around


Ears x2


Row 1: MC, CH 3 7 DC in it
Row 2: CH 3, 2 DC in each ST
Row 3: SC in each ST

cut yarn leave a tail long enough to join to the head


Quality test ^^


Legs x2

using black

Row 1: MC 6 SC in it
Row 2: 2 SC in each ST
Row 3: SC in next SC, 2 SC in same SC, repeat
Row 4: SC in next 2 SC, 2 SC in same SC, repeat
Row 5/7: SC all around
Row 8: SC in next 2 SC, DEC, repeat
Row 9: SC all around
Row 10: SC in FL for 16 ST, CH 1, turn, 16 SC

cut yarn weave in the ends

with brown join in the BL row

Row 11/14: SC all around
SLST in next stitch cut yarn leave a tail long enough to join to body


Arms x 2


with brown

Row 1: MC 6 SC in it
Row 2: 2 SC in each ST
Row 3: SC in next SC, 2 SC in same SC, repeat
Row 4/6: SC all around

now alternate white and red

Row 7/13: SC all around

SLST in next ST cut yarn leave tail long enough to join to the body

now make sure every body part are joined

you can sew a nose and mouth and an eye or used felt to make them

cut a piece of felt to create the eye patch


with felt you can also make a belt and a little sword

hope you enjoyed this pattern

see next time friends

xoxo


jeudi 30 mai 2013

Mickey Amigurumi

Hi again friend first I want to introduce My new friend I got him last week and he's such a cutie


and here's some cutnest overload


he's name is Stitch <3


Ok so now let's be serious well not much and let's get to work

I decide to do an amigurmi for my friend second daughter and she love mickey

I wanted to do something special and so far this amigurmi is my biggest


from that angle he look huge lol


so let's start with the "how to do it" this amigurumi

for that project you will need:

-yarn I use red heart confort in:- black
                                                  -white
                                                  -yellow
 -loop & threads Impeccable in: - heather (beige) or any skin like color
-black and white felt
-stuffing
-4 mm hook
-scissors
-fabric glue
-yarn needle
-2 white buttons

the stitch used:
-SC= single crochet
-HDC= half double crochet
-SLST= slip stitch
-DEC= decrease 2 SC together
-MC= magic circle
-ST= stitch


Head

Row 1: MC and do 6 SC in it pull tight
Row 2: 2 SC in each ST (12 SC)
Row 3: SC in next SC, 2 SC in same SC, repeat ( 18 SC )
Row 4: SC in next 2 SC, 2 SC in same SC, repeat (24 SC)
Row 5: SC in next 3 SC, 2 SC in same SC, repeat (30 SC)
Row 6: SC in next 4 SC, 2 SC in same SC, repeat (36 SC)
Row 7: SC in next 5 SC, 2 SC in same SC, repeat (42 SC)
Row 8: SC in next 6 SC, 2 SC in same SC, repeat (48 SC)
Row 9: SC in next 7 SC, 2 SC in same SC, repeat (54 SC)
Row 10: SC in next 8 SC, 2 SC in same SC, repeat (60 SC)
Row 11: SC in next 9 SC, 2 SC in same SC, repeat (66 SC)
Row 12: SC in next 10 SC, 2 SC in same SC, repeat (72 SC)
Row 13: SC in next 11 SC, 2 SC in same SC, repeat (78 SC)
Row 14: SC in next 12 SC, 2 SC in same SC, repeat (84 SC)
Row 15/26: SC all around (84 SC)
Row 27: SC in next 12 SC, DEC, repeat (78 SC)
Row 28: SC in next 11 SC, DEC, repeat (72 SC)
Row 29: SC in next 10 SC, DEC, repeat (66 SC)
Row 30: SC in next 9 SC, DEC, repeat (60 SC)
Row 31: SC in next 8 SC, DEC, repeat (54 SC)
Row 33: SC in next 7 SC, DEC, repeat (48 SC)
Row 34: SC in next 6 SC, DEC, repeat (42 SC)
Row 35: SC in next 5 SC, DEC, repeat (36 SC)
Row 36: SC in next 4 SC, DEC, repeat (30 SC)

SLST in next ST leave a long tail of yarn to be able to join the head to the body


Ears (make 2)


Row 1: MC and do 6 SC in it
Row 2: 2 SC in each ST (12 SC)
Row 3: SC in next SC, 2 SC in same SC, repeat (18 SC)
Row 4: SC in next 2 SC, 2 SC in same SC, repeat (24 SC)
Row 5: SC in next 3 SC, 2 SC in same SC, repeat (30 SC)
Row 6: SC in next 4 SC, 2 SC in same SC, repeat (36 SC)
Row 7: SC all around
SLST in next ST keep a tail long enough to join to the head


even Stitch want to help

now let's do the "face" part


Eyes (make 2) in beige

to make this part you will have to make a foundation chain
chain 2 wrap yarn over the hook once
insert in second chain from hook


pull trough once


now pull trough all 3 loop


now you have 1 foundation chain


10  foundation chain
- 3 HDC in first ST from hook
-9 HDC, CH 2, 10 HDC, 2 HDC in same ST, 1 HDC, 2 HDC in same ST, 10 HDC
-CH 2, 10 HDC, 2 HDC in same ST, 2 HDC in same ST, 1 HDC, 2 HDC in same ST, 2 HDC in same ST, 10 HDC
CH 1 pull cut yarn keep long tail


Mouth


foundation chain 20
3 HDC in first ST from hook, 18 HDC, 3 HDC in same ST, 21 HDC, 2 HDC in same ST, 1 HDC, 2 HDC in same ST, 20 HDC, 2 HDC in same ST, 2 HDC in same ST, 1 HDC, 2 HDC in same ST, 2 HDC in same ST, 20 HDC, 2 HDC in same ST, 2 HDC in same ST, 1 HDC, 2 HDC in same ST, 2 HDC in same ST, 21 HDC, 2 HDC in same ST, 2 HDC in same ST, 1 HDC, 1 HDC, 2 HDC in same ST, 2 HDC in same ST, 23 HDC, 2 HDC in same ST, 2 HDC in same ST, 1 HDC, 1 HDC, 2 HDC in same ST, 2 HDC in same ST,
CH 1 pull cut yarn keep a tail long enough

join with the eyes by doing SC around


join the bottom of the eyes with mouth


and HDC in between the eyes to join


now join with head make sure to slightly stuff the face


Nose in beige


Row 1: MC and do 6 SC in it
Row 2: 2 SC in each ST
Row 3: SC around
Row 4: SC in next SC, 2 SC in same ST
Row 5: SC around
Row 6: SC in same 2 SC, 2 SC in same ST
Row 7: SC around
Row 8: SC in next 3 SC, 2 SC in same ST
Row 9: SC around
Row 10: SC in next 4 SC, 2 SC in same ST

stuff join to face


Nose tip in black


Row 1: MC do 6 SC in it
Row 2: 2 SC in each ST
Row 3/5: SC around
Row 6: DEC
Row 7: DEC

stuff

join with nose


Body


start with red

Row 1: MC do 6 SC in it
Row 2: 2 SC in each ST (12 SC)
Row 3: SC in next SC, 2 SC in same SC, repeat (18 SC)
Row 4: SC in next 2 SC, 2 SC in same SC, repeat (24 SC)
Row 5:SC in next 3 SC, 2 SC in same SC, repeat (30 SC)
Row 6:   SC in next 4 SC, 2 SC in same SC, repeat (36 SC)
Row 7: SC in next 5 SC, 2 SC in same SC, repeat (42 SC)
Row 8: SC in next 6 SC, 2 SC in same SC, repeat (48 SC)
Row 9: SC in next 7 SC, 2 SC in same SC, repeat (54 SC)
Row 10: SC in next 8 SC, 2 SC in same SC, repeat (60 SC)
Row 11: SC in next 9 SC, 2 SC in same SC, repeat (66SC)
Row 12: SC in next 10 SC, 2 SC in same SC, repeat (72 SC)
Row 13/19: SC all around (72 SC)

now join with black

Row 20/25: SC all around (72 SC)
Row 26: SC in the next 10 SC, DEC, repeat (66 SC)
Row 27: SC in next 9 SC, DEC, repeat (60 SC)
Row 26: SC in next 8 SC, DEC, repeat (54 SC)
Row 27: SC in next 7 SC, DEC, repeat ( 48 SC)
Row 28: SC in next 6 SC, DEC, repeat (42 SC)
Row 29: SC in next 5 SC, DEC, repeat (36 SC)
Row 30: SC in next 4 SC, DEC, repeat (30 SC)

cut yarn weave in the end


join the white button


to make tail use the I-cord technique


Hands/arms make 2 with white and black


start with white

Row 1: MC and do 6 SC in it
Row 2: 2 SC in each stitch
Row 3: SC in next SC, 2 SC in same SC, repeat
Row 4/5: SC around
Row 6: do 3 SC in front loop the rest normal SC all around
Row 7/8: SC around
Row 9: SC in front loop all around
Row 10/11: SC around
cut yarn

join in the 3 front loop space


Try to form a circle by doing SC to form the thumb for 2 Row


cut yarn and weave in the tail in between stitch to close the thumb


add the three little black stripe on top of the hand


now join with black in the back loop row and do 15 row of SC all around to from the arm

stuff join to body


Feet and legs make 2


Row 1: MC and do 6 SC in it
Row 2: 2 SC in each ST
Row 3: SC in next SC, 2 SC in same SC
Row 4: SC in the next 2 SC, 2 SC in same SC
Row 5/8: SC around
Row 9: CH 1 turn 20 SC
Row 10/13: CH 1 turn 20 SC


fold the piece join with SLST


join yarn to form an edging SC around

SC in front loop all around

SC around for 2 row

with black join in the back loop
SC around for 15 row
join with red
SC around  for 5 row

stuff

join to the body


Hey you look fun


add eyes with felt and you're done!


hope you enjoy it see next time

xoxo